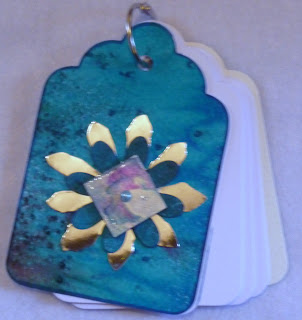
Welcome to this stop on the Craft Stamper Blog Hop looking back at favourite crafty things of 2012. If you didn't arrive here from Helen Chilton's blog you are missing out on fun and prizes! Pop over to the Craft Stamper Blog to start your journey at the beginning.
I'm Kate and I joined the Craft Stamper Design Team around three years ago after winning Stamper of the Year. For me crafting fun is as much about experimentation and the process of creating as it is about the finished piece. I work in a very organic (and messy) way, usually with the smallest germ of an idea to start with and just see what develops.
I have been making things since I was a child, making clothes and knitting as well as doing papercraft and mixed media experiments and confess to having lots of unfinished projects lurking as I get distracted by a new idea or new must have product.
Looking back at 2012 I wouldn't like to confess to how much new craft stuff I obtained. Suffice to say it significantly outweighed the amount I used! I was lucky enough to get an embellisher machine of which more later (much later as I am still learning to drive it ). But of all the things I got last year the most used and loved, as of now, is my Gelli Arts printing plate.
If you haven't come across these yet take a look at their blog or at the February issue of Craft Stamper for ideas. You can get fantastic results really quickly and easily with a very basic technique or develop ideas and skills further with very artistic results. I find the process of making prints somewhat addictive and made a huge batch of background papers as soon as my new toy arrived last summer.
Here are a few of the first background prints I made...
This is the absolute basic method - if I can do it anyone can. Truly it is simple. You get your Gelli plate out and put it on a smooth (imprtant so you don't give it a permanent pattern from any texture that a craft mat may have) surface. Add some small, and I mean small, blobs of paint. Roll the paint out into a thin layer with a brayer then make patterns with whatever stamps, stencils and other materials you have to hand.Then lay a sheet of paper - or fabric - over the top and burnish gently with your hand and peel back to reveal your print.
You'll find that bubble wrap crops up in virtually all the prints I have made so far. It is fantastic for making patterns, is soft so it doesn't harm your plate and best of all you don't have to wash it up. I am a very messy worker and find cleaning up a chore. Working with paint does mean a lot of washing up to keep your stamps and stencils in good condition. I am now thinking up ideas to use painty bubble wrap in projects - I have lots and can't bear to send it off to land fill without at least one more use first.
The next print is actually three or four prints on top of each other - made each time using the dregs of paint left after an initial print. A convenient way to substantially clean your plate without wasting paint. Whilst I was playing I didn't give any thought to what colours or patterns went on top of each other, it was only afterwards I discovered I rather liked this effect.
Again this is a basic print - with bubble wrap! This time however there was far too much white in the print so once the paint had dried I spritzed with spray inks and water which fills in the blanks so to speak. This is the reverse side of the print which has a softer watery feel. I think this may become the background to a spring themed project because it reminds me of frog spawn and ponds.
I think now the mornings are a bit lighter I must have spring on the brain because another of my background prints inspired me to make this quick tag. (Now there's another new toy from 2012 that I am more than a little obsessed with, a Sizzix die for cutting tags.) This was just a basic one colour print in orange. Not my favourite I have to say but making prints is a good way to use up those paints that are hanging about - they somehow get a new lease of life used in this way. I added yellow spray ink to fill in the white areas and worked on the front of the print this time.
These prints will be appearing in virtually every crafty make for some time yet as I think I must have used at least 100 sheets of paper and old book pages whilst playing with paint so please do visit again and see what I've been up to.
Thanks for looking. The letter you need to collect from me is F and the next stop in the hop is to Kim Costello. If you get lost at all simply return to the Craft Stamper blog for a full list of the hop participants.


